c++ 변수 선언하는 방법
#include <iostream>
struct Point
{
    int x = 0;
    int y = 0;     // c++11 부터 구조체 멤버 초기화 가능해짐.
};

int main()
{
    //if ( 1 ) {}    // c언어에서는 첫줄부터 변수 선언이 모두 된 이후에 코드를 넣어줬어야 했음.
    int n = 0;       // c++에서는 중간에 변수 선언을 해도 문제없음.

    //struct Point pt;

    Point pt;        // struct 사용하지 않고 바로 Point 클래스명으로 변수 선언 가능

    int n1 = 0b10;         // 2진수 표기법 (c++11 부터 지원)
    int n2 = 1'000'000;    // 자릿수 표기법 (c++11 부터 지원) 사람이 읽기 좋게 하려고 사용됨.


    bool b = true;        // false

    long long n3 = 10;    // 64bit 정수값 사용 가능

    char*    s1 = "aaa";   //
    wchar_t* s2 = L"AAA";  // UNICODE 표기법

    // char16_t  UTF16   (c++11 부터 지원)
    // char32_t  UTF32   (c++11 부터 지원)
    // char8_t   UTF8    (c++20 부터 지원)
    std::cout << s1 << ", " << s2 <<std::endl;

}

ERROR는 아니고 이처럼 warning이 뜨는 것을 볼 수 있는데, 추천하지 않는 방법임을 알 수 있다.
main.cpp:25:19: warning: ISO C++ forbids converting a string constant to ‘char*’ [-Wwrite-strings]
char* s1 = "aaa"; //
^~~~~
main.cpp:26:19: warning: ISO C++ forbids converting a string constant to ‘wchar_t*’ [-Wwrite-strings]
wchar_t* s2 = L"AAA"; // UNICODE 표기법
^~~~~~
aaa, 0x400a1c
uniform initialize
중괄호 { }를 사용해서 초기화 가능 (C++ 11에서 도입됨)
struct Point
{
    int x;
    int y;
};

int main()
{
    /*  기존의 초기화 방식들이 매우 다양함을 알 수 있다.
    int n1 = 10;
    int n2(10);  // C++

    int x[2] = {1,2};
    Point pt = {1,2};

    int n3 = 3.4;    // 0.4 데이타 손실이 발생
    char c = 300;    // 1byte 255까지만 가능한데...
    */

    // 중괄호 { } 를 사용해 일관된 초기화가 가능함.

    int n1 = {10};
    int n2{10};  // C++

    int x[2] = {1,2};
    Point pt = {1,2};

    int n3 = {3.4}; // error 를 통해 데이타 손실을 컴파일 에러로 알려줌.
    char c = {300}; // error 를 통해 데이타 손실을 컴파일 에러로 알려줌.

}
함수의 인자로 중괄호를 사용한 초기값을 전달할 수 있다
struct Point
{
    int x;
    int y;
};
void foo( int   n) {}
void goo( Point p) {}

int main()
{
    int n = {10};

    foo(10);
    foo( {10} );      //함수의 인자로 중괄호를 사용한 초기값을 전달할 수 있다.

    Point p = {1,2};
    goo( { 1,2} );    //함수의 인자로 중괄호를 사용한 초기값을 전달할 수 있다.

    int n1 = {0};  // copy initialization(복사 초기화)
    int n2{0};     // direct initialization (직접 초기화)
}
* explicit 생성자는 직접 초기화만 가능하다.
auto / decltype
c++에서 자주 사용하는 자동 변수 타입 지정 코드다.
auto와 decltype은 사용 방법이 다르고 초기값 필요 여부도 다르므로 필히 익혀 두어야 한다.
auto 사용방법은 간편하다. 우변의 수식에 의해 자동으로 좌변의 변수 타입이 정해진다.
decltype 은 ( ) 안의 표현식에 의해 변수 타입이 정해진다. 초기값은 필요없다.
int main()
{
    int x[5] = {1, 2, 3, 4, 5};

    auto n1 = x[0];    // 우변의 수식으로 자동으로 좌변의 변수 타입을 정함. 초기값 필요.
    //auto n2;        // error

    decltype(n1) n3;    // () 안의 표현식을 가지고 변수 타입을 정함. 초기값 필요없음.
    decltype(n1) n4 = n1;
}
auto n2; 의 경우 ERROR 발생하는데, 초기값이 없어서 발생된다.

decltype 심화 (1)
auto에 의해 결정되는 변수 타입에 대해 명확히 이해해야 decltype과 함께 사용이 용이하다.
int main()
{
    int n1 = 10;

    auto a1 = n1;       // int
    decltype(n1) d1;    // int


    int x[3] = { 1,2,3}; // int[3]

    auto a2 = x;  // 1. int a2[3] = x; 라고 컴파일러가 추론하면 error
                  // 2. int* a2 = x;   라고 컴파일러가 추론하면 ok.

    decltype(x) d2;  // int d2[3]  로 추론..
    // decltype(x) d3 = x; //   int d3[3] = x; 컴파일 에러


    int y[2] = {1,2};

    auto a4 = y[0]; // int

    decltype(y[0]) d4; // int 가 아니고 int&

}
d4가 int 타입으로 될 것처럼 보이지만 int&로 정의되는 부분에 주의해야 한다.

decltype 심화 (2)
함수를 어떻게 decltype에 넣어주느냐에 따라 완전히 다른 타입으로 정의된다.
#include <iostream>
#include <typeinfo>   // typeid(x).name() 사용 위해 필요한 헤더

int foo(int a, double d)
{
     return 0;
}

int main()
{
    foo(1, 3.1);

    decltype( foo )  d1;         // 함수 타입 - int(int, double)
    decltype( &foo ) d2;         // 함수 포인터 타입- int(*)(int, double)
    decltype( foo(1, 3.1) ) d3;  // 함수 반환 타입 - int
                                 // 실제 수행되지는 않으며 함수 반환 타입만 가져옴.


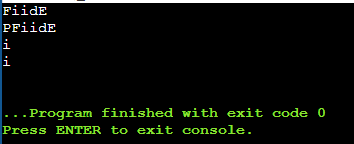
    std::cout << typeid(d1).name() << std::endl;
    std::cout << typeid(d2).name() << std::endl;
    std::cout << typeid(d3).name() << std::endl;


    const int c = 0;
    std::cout << typeid(c).name() << std::endl; //

}
typeid에 의해 출력된 값들이.... 이해가 좀 어려운데... 확인해봐야겠다.

결과로 나온 FiiDE, PFiidE, i 가 어떤 의미인지 확인하는 방법은
demangling 을 사용해 확인할 수 있다.
- 실행파일.exe | c++filt -t
> test_typeid.exe | c++filt -t
int (int, double)
int (*)(int, double)
int
typeid
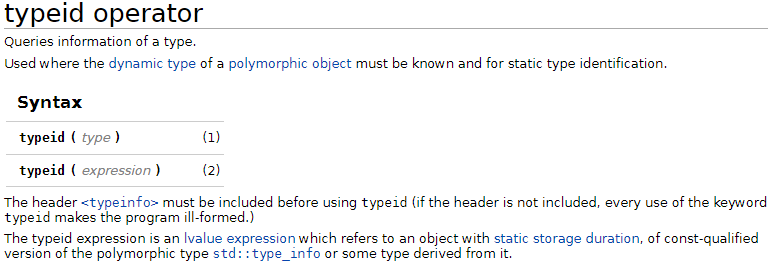
typeid(x).name() 사용을 위해서는 <typeinfo> 헤더가 필요하다.
완벽하게 정확한 타입이 나오지는 않고 참조용으로 확인해볼 수 있다. (const, volatile, reference 출력 안됨)
더 정확하게 알기 위해서는 boost 라이브러리 사용해야 한다.
https://en.cppreference.com/w/cpp/language/typeid
typeid operator - cppreference.com
Queries information of a type. Used where the dynamic type of a polymorphic object must be known and for static type identification. [edit] Syntax typeid ( type ) (1) typeid ( expression ) (2) The header must be included before using typeid (if the header
en.cppreference.com

using
using 을 타입의 별칭을 만들 때 사용할 수 있다. (c++11 부터 도입)
템플릿의 별칭도 만들 수 있다.
//*** c언어에서 자주 사용되는 방식 ***
//typedef int DWORD;
//typedef void(*F)(int, int);

using DWORD = int;
using F = void(*)(int, int);


int main()
{
    DWORD n; // int n
    F f;     // void(*f)(int, int)
}

c++열공!!!
'C++' 카테고리의 다른 글
| [C++] string : 비교, 대입, c_str() (0) | 2021.08.07 |
|---|---|
| [C++] 변수 선언 : constexpr, structure binding (0) | 2021.08.07 |
| [C++] cout, cin, iomanipulator (0) | 2021.08.05 |
| [C++] header : iostream, cstdio, cstdlib, (0) | 2021.08.04 |
| [C++] using namespace std; (0) | 2021.08.03 |


댓글